Thursday, December 13, 2012

diy christmas ornaments with the family!

i love family time. and everyone knows i love doing crafty things too. so why not combine the two!? i invited my sister and all the cousins over to have a christmas craft day. we stuck with silver and white which is the color theme on our christmas tree. i have yet to post photos of it (i will soon). my sister made a purple ornament that was too pretty to not include even if it didn't match the color theme. there was a lot of glitter involved. here is what they came up with...

so talented, right?! we also tried to make a gingerbread house. this is how it ended up

and this is what really happened

yep, his mouth is full and yep, that's icing on his face :) we had so much fun. here is the gang getting their craft on.
the wine is for the big kids (my sister and i), makes us create better ;)

Monday, November 12, 2012

diy vintage painted wall sign and butterflies

i finished this project a while ago and here it is! i wanted to make a sign to put in the foyer with a meaningful quote that everyone could see when they walked in and out of the house. and i had already planned to have the butterflies next to the sign.


here are the original butterflies that inspired me. the ones i did aren't exactly the same but i'm happy with the way they turned out.


since i explained how i made the butterflies in the previous post i figure i would explain how i did the sign. first, i used a piece of wood i purchased at home depot. you would think with new stuff being remodeled in the house i would just have a piece of scrap wood but i kept forgetting and instead threw it away. but it wasn't much to purchase. i used white trim paint that we already had to cover it. i put little paint on the brush and did layers of dry brushing so that some of the original wood showed through. it looks better when it's not perfect. i even peeled some of the edges of the wood to give it more of an aged look.


then i used acrylic paint i bought from michael's called sage. i also dry brushed this and did a thin layer so the white showed though.


I picked the font i wanted to use on the computer, printed it out on two sheets of 8.5x11 and taped it together. then took tracing paper and traced the letters. once they were on tracing paper i taped the tracing paper to the board and transferred the traced letters to the board. painted the letters and a border.


lastly I had my guy put hanging hooks on the back of it. in case you are wondering this is what the piece of wood originally looked like.


here it is in the foyer with abby in the picture of course.


Sunday, October 28, 2012

diy clay butterfly wall decor

i love etsy and get so much inspiration from there. it's also easy to get distracted with all their unique items, next thing i knew, 2 hour later and i wasn't even looking for what i originally went on there for. i don't mind though because i always find something interesting. i was looking up wall decor and came across these butterflies. side note; take a look at this persons shop they have a ton of beautiful ceramic items.


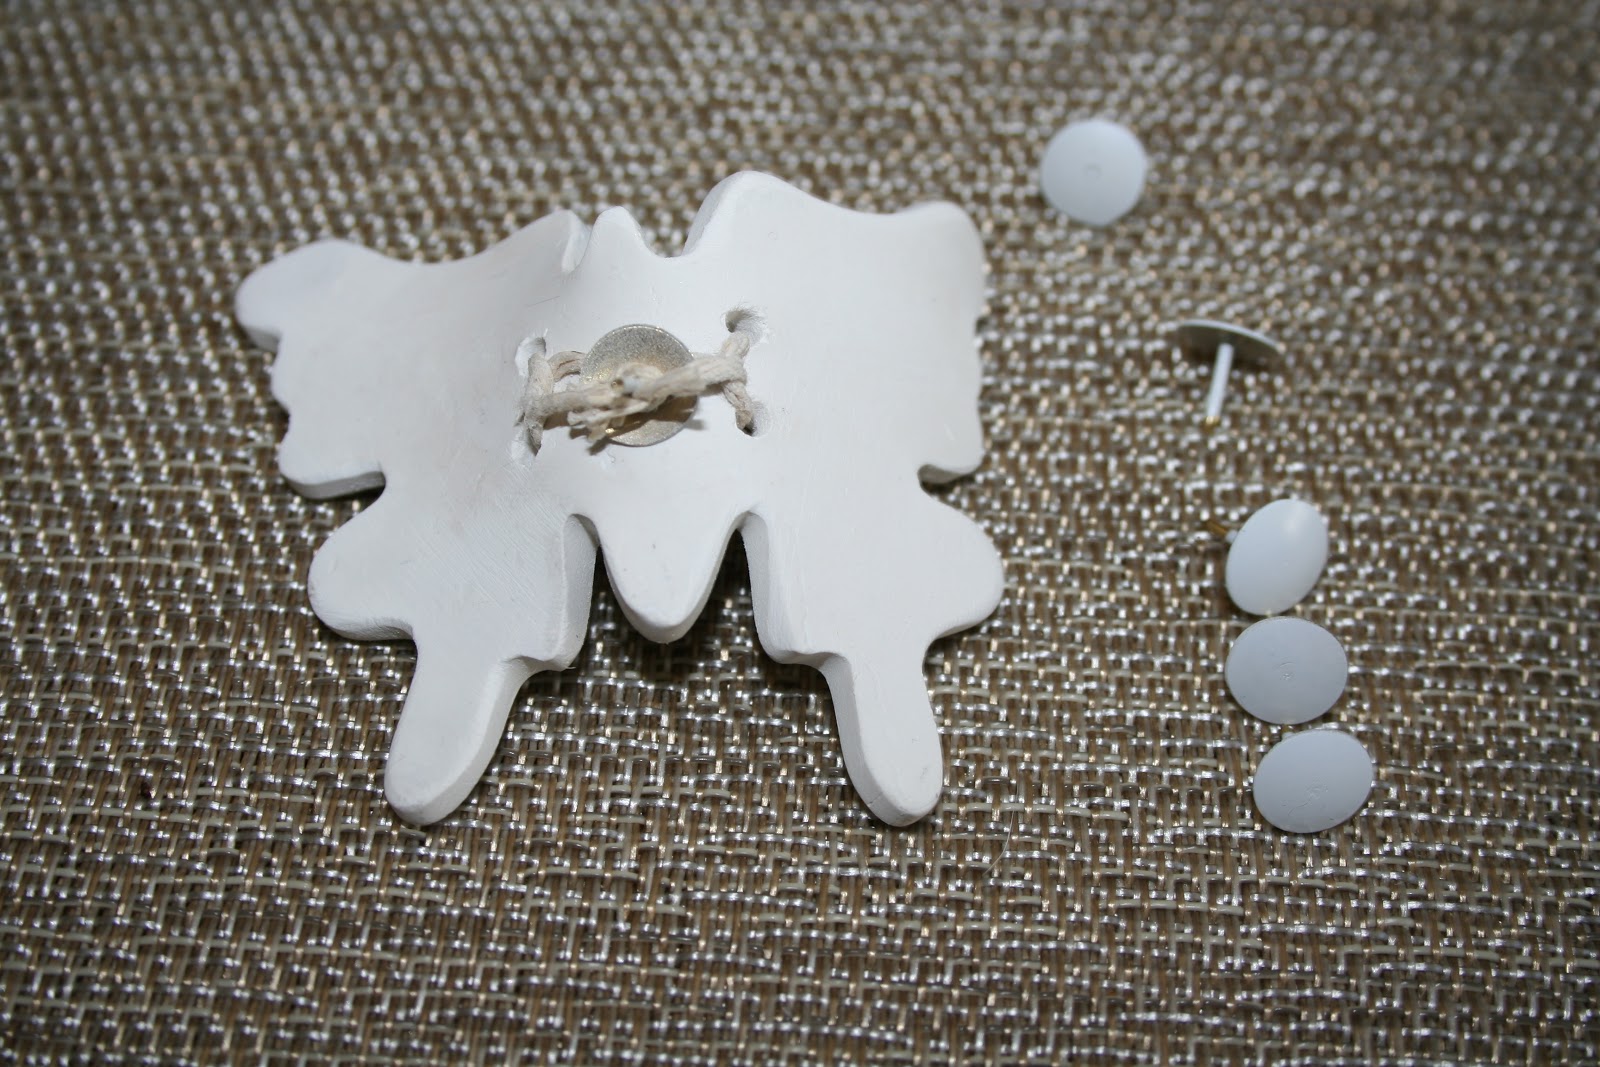
this is not what i had in mind at all for the wall but i really liked it. i couldn't bring myself to pay $28 for one butterfly and of course i wanted more than one. so i thought about the clay i used to make the minature figurines of taz and abby and wondered if i could use that. it worked! i'm sure it's not of the quality of the ones on etsy but it conveyed the same idea. i used bake shop, sculpey clay ($1.29, 2oz package). each package makes 2.5 butterflies. butterfly cookie cutter form world market ($1). and i used white hemp cord ($1.29) wrapped around the middle a couple of times to hang it.


the clay is really easy to work with. i cut out the shape using the cookie cutter. made four holes using a needle wiggling it around to make the hole bigger. i tried to put detail into them using lace so they looked like the ones on etsy but decided i like them better plain. then i placed each of them on a glass baking sheet. to get the variation in wings being opened i laid them down like a tent each at a different height. be aware that at whatever height you set it, it will fall a little due to the heat in the oven. placed in the oven for 15 minutes. they cool really fast.


on some of them i had to make the holes a bit bigger and took my exacto knife tip and twirled it around gently to scrape the hole a bit bigger. and because i'm a stickler for details i took a small piece of sand paper and smoothed the edges out. these are so easy to make and can be painted as well. for where these are going and because i like the natural feel it has as it is, i'm going to keep it in it's natural state.


for the final part I wrapped the hemp around the front in an x shape like the ones on etsy and wrapped it around to the back into a knot. i painted thumbtacks white so if you are able to see them they blend in with the butterfly. i pushed the needle through the knot and stuck them on the wall. i already have in mind how they will be on the wall so the final photo will be posted shortly.

here is my little helper, making sure work gets done.


and of course there is taz, umm gaurding the door, kind of :)


... and here is how they turned out.


Sunday, October 7, 2012

alexis and brett's wedding invitations

this is the follow up wedding invitations from these save the dates. alexis and brett wanted to keep their invites simple and elegant. she is having a destination wedding and the theme colors of her wedding are white and creams. even her bridesmaids are wearing white. i love this idea. white looks so clean. love, love everything about white when it comes to design. i wish more people would let design breath with white space. anyhow the paper on the invites is absolutely gorgeous. it is a metallic pearl that gives it a beautiful sheen. she also didn't want to have any sort of design and instead wanted to use typography for the design element. i loved doing these because they were so different then any of the other invites i have done. i was able to step out of tradition for bit. the client allowed me to truly keep it simple. i have always believed less is more.


the invitations consisted of an enclosure that contained the main invitation and three separate pieces in the pocket of the enclosure. the pocket held the rsvp, rsvp envelope, in the know and an itinerary. all these were cut at different heights so when stacked each header could be seen. the enclosure was held together with brown hemp to still have the 'feel' of the beach theme wedding. additionally a tag was tied along with the hemp that had the couples names and date of the wedding.

Thursday, October 4, 2012

diy birthday banner

I made this a while ago but kept forgetting to post it... august 19th we had our first gathering slash birthday celebration at the house. we had a birthday celebration for my cousin, abuelita and my boyrfriend's mom. i was a little nervous hosting it because we weren't done with the house. but i felt like if we waited until then, we would never have people over. it feels like there is always something that needs to be done with the house. 

everyone came! i felt like it was christmas. at one point there were more than 35 people in our second level. which lead me to thinking we have to get the basement together to make more room. one of the things i was looking forward to when getting a house was having gatherings. i love when all the family is together. and every time i always think, i'm so lucky and grateful. everyone brought delicious food and we had four desserts! see i told you i'm lucky :)

i wanted the birthday people to be recognized so i made a banner with photos. the banner i made from scrap paper i had from a previous project. michael's sells these wonderful design paper packs that have a variations of designs on them. because i had so much paper left i made each square double sided that way i could mix up the design for future uses as well. i wanted removable letters so i can change the message each time i use it. i cut circles out of bristol board and glued printed letters on them. the circles were attached to the squares with removable qlue dots from michael's. punched holes at the top of the square and threaded ribbon through for hanging. i also added left over ribbon i had on each side to add more color. lastly i printed photos of the birthday people in a circle shape, thought it tied in well with the circle letters. we have a huge wall that divides the dinning room and kitchen that eventually will be knocked down to open the second level even more. but for now it was perfect to be able to hang the entire banner in one row. i think i'll make it my theme wall when we have gatherings until we knock it down.


Tuesday, October 2, 2012

final piece to mantel decor

a couple of weeks ago i went to lucketts, if you haven't been and live in va you should go. warning: you will want to live there or buy everything! i love looking at their displays because it gives me ideas. i came across this display and liked the weathered look of the stone candlestick. this was my splurge, $20 each. i bought 2 of them. i didn't think it was too bad for how heavy they are. it's the real deal, if anything i can use it as a weapon. kill two birds with one stone haha. ok that was cheesy but i had to. this is the mantel at lucketts in the design house:


the mantel at lucketts also inspired me to have something bird-like on the mantel. the ones at lucketts were cast iron and nice but for some reason i didn't get them that day and it's a hike to get out to lucketts so i was regretting it. i searched on-line, not impressed. then one day i walked into michael's. i say this like it's random but i go to michael's at least once a week. i stopped by the home decor section and i saw teal ceramic birds for $2.99 plus 40% off. this could not have been more perfect. fantastic price and just the right color for the color scheme of the living room. voila! the mantel :)


diy faux mercury glass votives

for the first time we have a fire place which means we have a mantel. i'm so excited to decorate it. i want to keep it the same for the most part but when halloween and christmas come around i definitely want to switch it up. i always like using what we already having and sprucing it up. i started out with small candle votives i have had for years. i believe i got them at target, they were really cheap. as i was searching the internet for inspiration of course i stopped by miss musterseed's website and found this tutorial on making faux mercury votives. i like the look of this and decided to go with it. i bought gold and silver leaf which wasn't cheap but i had a coupon so that helped plus i have so much left over to turn more things silver :) so the mantel started with the votives.